Thursday, December 29, 2011

[Quadcopter]Autodesk Inventor preliminary CAD drawings

I've been using Inventor 2012 to model the quadcopter and experiment with motor mount designs.

Top center view. The electronics mount plate has been removed, but the bolts are still there.

Center exploded view

Center exploded view #2

Motor exploded view and yes, the prop does spin :)

Motor mount design #1

Motor mount design #2

Motor mount design #3

Motor mount design #4

Motor mount design #5 has a sheet steel base with CF pieces to
reinforce the  bends of the steel. 
Full view of quadcopter

Another view of the quadcopter

Bottom view

[Quadcopter]Propellers

APC 11x4.7 SF CCW and CW props
11x4.7 Slo-Fly CCW and CW props
3 CCW and 3 CW props

Wednesday, December 21, 2011

[Quadcopter] Control board

Here are some pics of the DIY MultiWii control board i made for the quadcopter which is alot cheaper and works just as well as the more expensive CIRUS boards. Its based on the breadboardduino, then I just added pin headers for the ESCs, Rx, and the IMU.
Quadcopter specific part of the control board.
The Rx needs to have 5v, GND and then signal for each Rx channel.
Each ESC needs GND and Signal connected, then one ESC will have 5v connected to power the board.
Serial adapter and IMU attached, Sugru to reinforce the headers.

Back of the board; like a rats nest, i know :)
I could have laid the wires flat against the board, but its done and works.
Front


Tuesday, December 20, 2011

Pololu 9DOF MiniIMU

The 9DOF package contains: L3G4200D 3-axis gyro; a LSM303DLM 3-axis accelerometer and 3-axis magnetometer. It arrived yesterday (Dec 19), and so I tried out Pololu's provided AHRS(attitude and heading reference system) sketch for Arduino. Pololu 9DOF MiniIMU website

the output looks like this on the serial monitor: (the first value is (in aircraft terms) roll, second is pitch, third is yaw.)
!ANG:13.54,-21.50,-90.32
!ANG:13.55,-21.54,-90.29
!ANG:13.47,-21.55,-90.24
!ANG:13.48,-21.58,-90.23
!ANG:13.46,-21.58,-90.25
!ANG:13.50,-21.54,-90.28
!ANG:13.51,-21.54,-90.28
!ANG:13.40,-21.54,-90.21
!ANG:13.32,-21.52,-90.14
!ANG:13.36,-21.49,-90.14
!ANG:13.35,-21.45,-90.17
!ANG:13.38,-21.40,-90.18
!ANG:13.32,-21.36,-90.15

With this working, i have nothing to do really (maybe read the enormous RC Groups forum for more background info) before the rest of the quadcopter parts from hobbyking to arrive.


Saturday, December 10, 2011

Arduino Tap Back

I saw a video on the arduino forum of someone using a piezo to detect taps/knocks etc, and then play them back with a vibrating motor. I though it'd be pretty fun ot make one too, but i instead used the LM386 amp from my previous project and the tone() function in arduino to play back the tones.

I hooked up the piezo like so:


and then the lm386 to a digital port like:


CODE: 

#define spkr 4 //digital pin to lm386
#define piezo 5 //analog pin piezo is on
int timeFirst;
int loopnum = 0; //# of times a tap is detected
int timeSecond;
int TapDelay;
int timeStore[15]; //how many taps you want to record
int lengthtest;
void setup()
{
  Serial.begin(9600);
  noTone(spkr);
}

void loop()
{
  int sensorValue = analogRead(piezo); //read the piezo value
  Serial.println(sensorValue, DEC); // print to serial for debug
  if (sensorValue > 50) //physically taping on the piezo gives results to around 400
  {                    //its about 30 when still
    if(loopnum!=0) //run only if its not the first tap detected
    {
      timeSecond = millis(); //record time tap happened
      TapDelay =(timeSecond - timeFirst); //how long between taps
      timeStore[loopnum]=TapDelay; //write time between taps to array

      Serial.println();
      Serial.print("# of taps detected: ");
      Serial.println(loopnum);
    }
    timeFirst = millis(); //record time at tap to calc time between next tap and current tap
    ++loopnum; // increase by one so that next tap delay is written to next array value
  }

  lengthtest=millis();
  if((lengthtest-timeFirst)>2000 && loopnum>0) //2000msec is how long to wait before playback after last tap
  {
    Serial.print("playback");
    for(int x=1; x<=loopnum; ++x) //go through timestore array and play taps with the recorded delays
    {
      tone(spkr, 300);
      delay(175); // how long to play each tap for
      noTone(spkr);
      delay(timeStore[x]);  //delay between taps
    }
    loopnum=0; //reset tap counter
  }
  delay(175); //delay to reduce amount of data, one tap can count as multipule because the arduino sample too often.
}

[Quadcopter]Been a while...

The last few weeks I’ve been scouring the rcgroups.com forum, which has anything RC(remote control) related, for information on building a quadcopter.

I’ve come up with this design, and just recently ordered it:
Turnigy Nano-Tech 4000mah 35-70C LiCo
Turnigy Accucel-6 50W 5A Balancer/Charger
KDA 20-22l 17A brushless motors
11x4.7 CW+CCW props
Turnigy 25A Plush ESCs
Custom CF(carbon fiber) 1000mm frame
Turnigy 9X 9ch 2.4ghz transmitter and receiver
MinIMU9--Gyro, Accelerometer, and Compass
LED strips, wiring, small bolts, heat shrink, small 480p camera

Its more of a weight lifting quad, but it should be able to do some flips/3D tricks. It all came from hobbyking.com except for the sensors and the props, which came from quadroufo.com and pololu.com, respectively.

Here are buddy codes so that you can get some of the products i bought for cheaper:
Socket Head Bolt 4x20mm (10 pack), Socket Head Bolt 4x16mm (10 pack), 30min epoxy, 300x100mm 1.5mm CF sheet, Turnigy Plush 25Amp ESC, KDA 20-22l
all found here: RC International

Shipping:
Props: shipped December 12, arrived December 15
MiniIMU: shipped December 15, arrived December 19
HobbyKing: Dec 12th; two weeks for backorder, two more weeks for shipping

Tuesday, November 22, 2011

Improved IR code Reciever

Now only a little reformatting is needed on the IR code serial data received before inserting it into a Arduino IR sending program. All you have to do is to remove all digits before the first comma:

Raw (68): 11152,9100,4450,550,600,500,650,500,600,550,600,500,600,550,600,500,650,500,600,500,1750,500,600,550,600,600,1650,550,1750,500,600,500,600,550,1700,550,1750,500,600,550,1750,500,600,500,1750,500,600,550,600,550,600,500,600,550,1750,450,650,500,1750,500,600,550,1750,500,1750,500,1750,500
to
Raw (68): 9100,4450,550,600,500,650,500,600,550,600,500,600,550,600,500,650,500,600,500,1750,500,600,550,600,600,1650,550,1750,500,600,500,600,550,1700,550,1750,500,600,550,1750,500,600,500,1750,500,600,550,600,550,600,500,600,550,1750,450,650,500,1750,500,600,550,1750,500,1750,500,1750,500

But if it is a recognized code, then it will output like(still need to remove all digits before the first comma):
Decoded NEC: 99E817 (32 bits)---OR---Raw (68): 47990,9100,4450,600,550,550,550,550,600,600,550,550,550,550,600,500,600,600,550,600,1650,600,500,600,550,550,1700,600,1650,550,600,500,600,550,1700,550,1750,550,1700,600,1650,550,550,600,1650,550,600,600,550,550,550,600,550,500,600,600,550,500,1750,550,550,550,1750,500,1750,500,1750,500
Look at my previous post on how to use these RAW or DECODED IR codes...


CODE:
#include <IRremote.h>

int RECV_PIN = 11;

IRrecv irrecv(RECV_PIN);

decode_results results;

void setup()
{
  Serial.begin(9600);
  irrecv.enableIRIn(); // Start the receiver
}

// Dumps out the decode_results structure.
// Call this after IRrecv::decode()
// void * to work around compiler issue
//void dump(void *v) {
//  decode_results *results = (decode_results *)v
void dump(decode_results *results) {
  int count = results->rawlen;
  if (results->decode_type == UNKNOWN) {
    Serial.println("Could not decode message");
  }
  else {
    if (results->decode_type == NEC) {
      Serial.print("Decoded NEC: ");
    }
    else if (results->decode_type == SONY) {
      Serial.print("Decoded SONY: ");
    }
    else if (results->decode_type == RC5) {
      Serial.print("Decoded RC5: ");
    }
    else if (results->decode_type == RC6) {
      Serial.print("Decoded RC6: ");
    }
    Serial.print(results->value, HEX);
    Serial.print(" (");
    Serial.print(results->bits, DEC);
    Serial.print(" bits)---OR---");
  }
  String Test1 = String();
  Serial.print("Raw (");
  Serial.print(count, DEC);
  Serial.print("): ");

    for (int i = 0; i < count; i++)
  {
    Test1+=(results->rawbuf[i]*USECPERTICK);
    Test1+=(",");
  }
  Serial.println(Test1);
}


void loop() {
  if (irrecv.decode(&results))
  {
    dump(&results);
    irrecv.resume(); // Receive the next value
  }
}

Sunday, November 13, 2011

Arduino PS2 Emulator-Computer Control!

I wanted to control my computer with a Arduino and sonar module, but wasn't exactly sure how to connect the computer and Arduino. I could either send data via serial and have a C# program interpret the data and emulate a key press accordingly, or I found a way for the Arduino to act as a PS2 keyboard. Once i learn more about C# I may redo it, but using the PS2 emulator is the far easier option. The program is pretty similar to the TV sonar control program except it sends PS2 commands for tabbing, volume, copy and paste. To connect it to the computer i just have to connect the two digital pins specified in the code to the appropriate pins in a PS2 connector and plug it in to my computer. The Arduino sends keys using "scan codes"; these are universal to any PS2 keyboard, so it could probably work on a Mac. More after the break.

Saturday, November 12, 2011

Use sonar to control a TV!

Also with a sonar module, i have controled my TVs volume, power, and channel functions. The Arduino reads the position of my hand(whether it is in motion, or in a not moving in a certain range), and the acts depending on where my hand is.

How to get and send IR  codes:
Use the IRRecvDump program and library for Arduino from here: Ken Shirriff's blog: A Multi-Protocol Infrared Remote Library for the Arduino. Then hook up a IR receiver module(shown how in the link) and IR LED(to send the ir codes) to the Arduino. Run IRRecvDump and point a remote at the Arduino and press one of the remote's buttons. The Arduino will send the code to the Arduino serial monitor. It should look something like:
Raw (26): 23420m 2400m 650m 1150m 600m 600m 600m 1200m 600m 650m 550m 1150m 650m 650m 550m 550m 650m 1150m 650m 550m 650m 550m 600m 600m 600m 600m
Take out the first string of numbers (so "23420m" in my case), then remove all the "m " and replace with ","s. It should look like:
Raw (26): 2400,650,1150,600,600,600,1200,600,650,550,1150,650,650,550,550,650,1150,650,550,650,550,600,600,600,600
now in the arduino code like this(Note: 26 in the snippit below is the length of the array, not from "Raw (26):"):
unsigned int powerOn[26] = {2400,650,1150,600,600,600,1200,600,650,550,1150,650,650,550,550,650,1150,650,550,650,550,600,600,600,600};
Then to send the IR code with arduino:
irsend.sendRaw(powerOn,26,38);
The 26 here is from "Raw (26):". 38 is the IR frequency, which is the same every where for TV pretty much.

Now if you get something like: "Received SONY: A90" when you used the IRRecvDump program with arduino; all you have to send that IR code with a Arduino is:
irsend.sendSony(0xa90, 12);

Also, in the case of sony IR codes, they have to be sent 3 times with 50ms or so delay between each, so like:

    irsend.sendRaw(powerOn,26,38);
    delay(50);
    irsend.sendRaw(powerOn,26,38);
    delay(50);
    irsend.sendRaw(powerOn,26,38);

Arduino Code to send IR codes:

#include <IRremote.h>
IRsend irsend;

const int numReadings = 5;   // set a variable for the number of readings to take
int index = 0;                // the index of the current reading
int total = 0;                // the total of all readings
int average = 0;              // the average
int oldAverage = 0;           // the old average
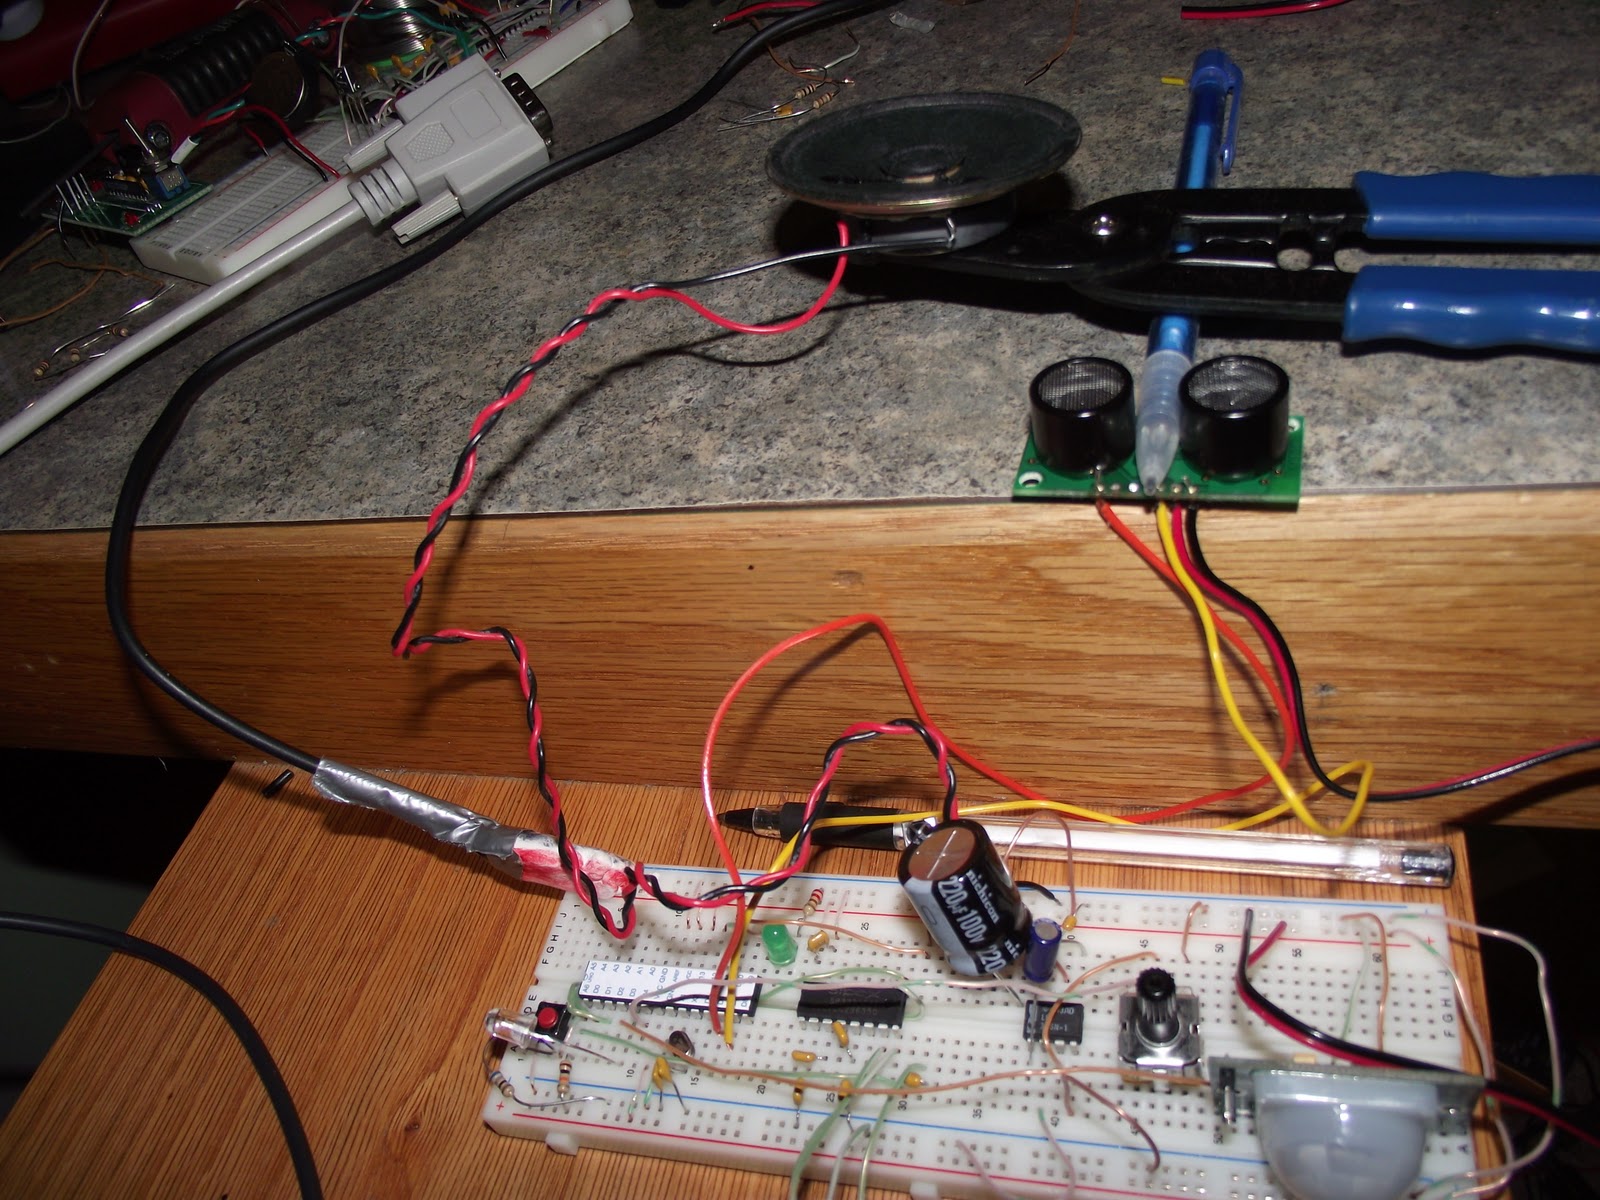
int echoPin = 6;              // the SRF05's echo pin
int initPin = 7;              // the SRF05's init pin
unsigned long pulseTime = 0;  // variable for reading the pulse
unsigned long distance = 0;   // variable for storing distance

// setup my arrays for each signal I want to send
unsigned int powerOn[26] = {
  2400,650,1150,600,600,600,1200,600,650,550,1150,650,650,550,550,650,1150,650,550,650,550,600,600,600,600};
unsigned int soundUp[26] = {
  2350,600,600,600,1200,600,600,600,550,650,1150,650,550,650,600,650,1100,600,600,600,600,600,550,650,550};
unsigned int soundDown[26] = {
  2350,650,1150,650,1150,600,600,600,600,600,1250,550,550,650,550,650,1150,650,550,650,550,600,600,600,600};
unsigned int channelUp[68] = {
  8950,4550,500,650,450,1750,500,600,500,650,450,1800,400,650,450,700,450,550,550,700,400,650,500,1700,500,650,450,1750,500,1700,450,700,450,700,400,800,350,600,500,600,500,1700,550,600,450,650,450,700,400,700,450,1750,500,1700,500,1750,450,650,450,1750,500,1700,500,1750,500,1750,450,};
unsigned int channelDown[68] = {
  8950,4600,400,650,500,1750,450,650,450,700,400,1750,500,650,450,650,450,700,450,600,500,650,450,1700,550,550,550,1750,400,1850,400,650,450,650,500,1750,450,650,450,650,550,1650,500,650,550,550,650,450,500,600,550,550,500,1750,500,1700,500,600,500,1750,450,1750,600,1650,450,1750,500};

void setup()
{
  // make the init pin an output:
  pinMode(initPin, OUTPUT);
  // make the echo pin an input:
  pinMode(echoPin, INPUT);
  // initialize the serial port:
  Serial.begin(9600);
}

void loop()
{
  // loop for a number of readings on the SRF-05 to get an average to smooth the results. Much like all my other examples
  for (index = 0; index<=numReadings;index++) {
    digitalWrite(initPin, LOW);
    delayMicroseconds(50);
    digitalWrite(initPin, HIGH);
    delayMicroseconds(50);
    digitalWrite(initPin, LOW);
    pulseTime = pulseIn(echoPin, HIGH);
    distance = pulseTime/58;
    total = total + distance;
    delay(10);
  }
  // store the previous reading
  oldAverage = average;
  // store the current reading
  average = total/numReadings;
  // debug to check for spikes in the sensor etc..
  Serial.println(average);

  // now the fun part...
  // if my distance is less than 5...
  if (average <= 5)
  {
    Serial.println("Power");
    // use Kens IR library to send my signal (array, number of items in array, Khz)
    irsend.sendRaw(powerOn,26,38);
    delay(50);
    irsend.sendRaw(powerOn,26,38);
    delay(50);
    irsend.sendRaw(powerOn,26,38);
    // these delays depend on how long it take my device to recognise the signal sent and to act - I don't want to send signals that aren
    //getting read etc..
      delay(4000);
    // otherwise if my hand is higher
  }
  else
  {
    // check to see if my hand is in the registered space above the sensor
    if (average <=20 && average >=10 && oldAverage >=10)
    {
      // the below statement is our sensitive the readings are so if the current and previous readings are different with a tolerance of +/
      //we can look at the direction of movement
        if ((average != oldAverage) && (average+1 != oldAverage) && (average-1 != oldAverage))
      {
        // if the current reading is higher than the previous, then my hand is moving upwards
        if (average > oldAverage)
        {
          Serial.println("Channel Up");
          irsend.sendRaw(channelUp,68,38);
          delay(2000);
        }
        else
        {
          // otherwise if it is below then my hand is moving downwards
          if (average < oldAverage && oldAverage <=20)
          {
            Serial.println("Channel Down");
            irsend.sendRaw(channelDown,68,38);            
            delay(2000);
          }
        }
        // otherwise my hand must be stationary so check where it is.
      }
      else
      {
        // if my hand is stationary between 10 and 15 cms away from the sensor
        if (average >= 10 && average <=15)
        {
          Serial.println("Sound down");
          irsend.sendRaw(soundDown,26,38);
          delay(50);
          irsend.sendRaw(soundDown,26,38);
          delay(50);
          irsend.sendRaw(soundDown,26,38);
        }
        else
        {
          // if my hand is a bit higher up...
          if (average >= 16 && average <=20)
          {
            Serial.println("Sound up");
            irsend.sendRaw(soundUp,26,38);
            delay(50);
            irsend.sendRaw(soundUp,26,38);
            delay(50);
            irsend.sendRaw(soundUp,26,38);
          }
        }
      }
    }
  }
  // clear our index and total for the next reading just in case
  if (index >= numReadings)
  {
    index = 0;
    total = 0;
  }
}


Note: mostly not my code, just modified for my IR codes.

Analog Joystick with Arduino!

I have a old Gravis Blackhawk joystick that i dug up to use with my Arduino. I opened up the back, and it doesn't have any electronics, just a circuit board splitting out the DB15 connector to all the buttons etc(no ICs etc). It has 3 buttons on the stick, a throttle pot and another button on the base, and of course the X + Y axis slider pots for the stick. All the buttons are each wired to a pin of the DB15 connector and the other side goes to GND. The X + Y axis and the slider are connected to +5v, GND and a pin for each on the DB15.


The Arduino programming was really simple. All i had to do was read 3 analog ports for the X,Y and throttle pots, and 4 Digital pins for the buttons. Then I put them all into a string like: "X,Y,SpeedPot,btn1,btn2,btn3,btn4" and printed to serial. Also, this Arduinio code uses millis() rather than delay to be more precise in delays. 


I finally made the C# interface app, but never posted it, so you can find it HERE as a zip*
*note: the file is .zip but I renamed it to '.zipp' to get around Google's file protection. Download it, then remove a 'p' from the end of the file name and extract! Below in comments, let me know if you have any issues.


Picture and Scheme of joystick:


//-----Axis-------------------------------------------------------//
#define Xaxis 3  //Joystick X axis Analog pin 3
#define Yaxis 4  //Joystick Y axis Analog pin 4
#define SpeedPot 5  //Pot in base for speed, Analog pin 5

int XaxisVar = 0;  //...analog pin 3---X axis
int YaxisVar = 0;  //...analog pin 4---Y axis
int SpeedVar = 0;  //...analog pin 5---Speed pot
//----------------------------------------------------------------//

//-----Buttons----------------------------------------------------//
#define TrigBtn 2  //trigger button, digital 2
#define MidBtn 6  //Button below trigger on joystick, digital 3
#define LowBtn 4  //Lowest button on the joystick, digital 4
#define BaseBtn 5  //button on base of joystick, digital 5

int TrigBtnState = 0;  //Stores the state of TrigBtn
int MidBtnState = 0;  //...MidBtnState
int LowBtnState = 0;  //...LowBtnState
int BaseBtnState = 0;  //...BaseBtnState
//----------------------------------------------------------------//
int HypDelayTime = 100;  //time you want the code to loop at. will be used to figure actual delay time(see end of code).

void setup()
{
  Serial.begin(9600);

  for (int pin=2; pin<=6; ++pin)  //sets all digital pin 2-5 as input and enables internal pullups.
  {                        
    pinMode(pin, INPUT);  //sets button pins to input
    digitalWrite(pin, HIGH);  // sets the pull up.
  }
}

void loop()
{
  int TimeInt = millis();  //record time at begining of main loop

  XaxisVar = analogRead(Xaxis);  //Read X-Axis postion
  YaxisVar = analogRead(Yaxis);  //Read Y-Axis postion
  SpeedVar = analogRead(SpeedPot);  //Read Speed Pot postion

  TrigBtnState = digitalRead(TrigBtn);  //read status of buttons on joystick
  MidBtnState = digitalRead(MidBtn);  //...
  LowBtnState = digitalRead(LowBtn);  //...
  BaseBtnState = digitalRead(BaseBtn);  //...

  //Just serial ouput formatting...
  String Comma = String(",");
  String Data = String(XaxisVar + Comma + YaxisVar + Comma + SpeedVar + TrigBtnState + Comma + MidBtnState + Comma + LowBtnState + Comma + BaseBtnState);
  Serial.println(Data);

  int TimeEnd = millis();  //record time at the end of main loop

  //the DelayTime is the time so that the code actually repeats at 1000ms.
  //"Time we actualy want to delay"="EndOfCodeTime"-"BeginingOfCodeTime"="time taken for code to execute"-"hypothetical delay"(what we wanted to delay(1000ms))
  int DelayTime = HypDelayTime - (TimeEnd-TimeInt);
  delay(DelayTime);
  //Serial.println(DelayTime); //prints delay time. is about ~980ms, so we can tell that all the signal reading and formating takes 20ms.
}

Saturday, November 5, 2011

Awesome hidden Google features!

Simply search these terms in google, and you'll see:
tilt
do a barrel roll
google gravity (must be searched through "I'm Feeling Lucky")

Direct Links:
http://www.google.com/search?btnG=1&pws=0&q=tilt
http://www.google.com/search?btnG=1&pws=0&q=do+a+barrel+roll
http://mrdoob.com/projects/chromeexperiments/google_gravity/

Note: They may only work in chrome and definitely not in Internet Explorer.


Wednesday, November 2, 2011

Call of Duty: Modern Warfare 3 Countdown Timer!

I made a flash app of a countdown for the up coming COD: MW3 release. I've had it for a while, but here it is:

In full 1080p HD glory...http://dl.dropbox.com/u/28052258/CntDwn-MW3.swf


I cant even remember what it does when it reaches 00:00:00:00:000...

Broken iMac Teardown

I received a broken iMac G5 that someone found in a junk bin. I was told it was a bad PSU since it didn't even turn on, but further investigation revealed otherwise. It didn't even have a back panel or stand when i got it, so its internals were easily accessible. After it didn't turn on the first time, I looked at the logic board(aka Mobo) and found that the Ethernet or wireless IC blew up(or was surged through the LAN port) because the whole area around it was black with soot, and some of ICs were also missing. Also, at least 50 SMD resistors or capacitors were missing from the board(someone exploring the insides of their broken iMac?).

So, i took out all the cool stuff that was left as someone already took the HDD and ODD. I got:
1. 3 - those fancy apple blower fans
2. 2 - 16ohm .5W speakers
3. 1 - scratched, but probably working 1440x900 widescreen 17in LCD
4. PSU
5. Scratched up front case(maybe sand it down, and use for a Hackintosh build case?)
6. Huge heat sink that covered the North Bridge, 1.6Ghz CPU, and Geforce MX Graphics chip
7. 1/8in chuck of copper plate for cooling other side of Logic Board
8. De-soldered all the caps, ICs, interconnects, etc from Logic Board.
9. Sata power cable that connected to Logic Board.
10. A working 24v LCD backlight driver. Note: The LCD driver was built into logic board so i couldn't test it, but the backlight driver was separate.


I figured out the pinout for the 6 and 4 pin fan power connectors(I haven't quite exactly figured out what the solid grey wire is, I'm guessing something with RPMs):


Pics below:
Front Case

Sata power cable, LCD backlight driver, and caps/connectors etc from Logic Board

Heatsink


Speakers, and blower fans powered from a benchtop PSU


Logic Board mounting hardware inside front case, PSU, and copper plate :)
Lots of fun stuff to tinker with!


Saturday, October 29, 2011

Ultrasonic Theremin

UPDATE: i have redone the code in the last hour with the help of some Arduino forum members (mainly "Nick Gammon", thanks!), and now it is way more responsive...New vid up

Friday night i made a thermin using a ultrasonic module. the arduino reads module which says how far away my hand is from it(the module) in centimeters. then according to how far my hand is away from the module, the Arduino plays a coordinating tone. the closer my hand is, the lower the tone the speaker plays and each tone has 5 centimeters. so the first 5cm in front of the sensor is dead space, then 5 to 10cm is the lowest tone, and 10 to 15cm is the a little higher tone and so on up to 70cm


The distortions are actually caused by the code being too efficient, i figured out that i needed to add a delay before the code loops again.

Code:

#define trig 7 //trigger pin on sonar module
#define echo 6 //echo pin
#define spkr 4
#define led 12
int dist; //how far the object is away from the module(cm)
float valueSensor=0;

//tones array which holds the frequency to play.
float pitchTable[] = {
  329.63, //E4
  349.23, //F4
  369.99, //F#4/Gb4
  392.00, // G4
  415.30, // G#4/Ab4
  440.000000, // A
  466.163757, // A#/Bb
  493.83301, // B
  523.251160, // C
  554.365234, // C#/Db
  587.329529, // D
  622.253967, // D#/Eb
  659.255127, // E
  698.456482, // F
  739.988831, // F#/Gb
  783.990845, // G
  830.609375, // G#/Ab
  880.00, //A5
  932.33 //A#5/Bb5
};

#define NUMITEMS(arg) (sizeof (arg) / sizeof (arg [0]))

void setup()
{
  pinMode(echo, INPUT);
  pinMode(trig, OUTPUT);
}

void loop()
{
  //send a trigger signal
  digitalWrite(trig, HIGH);
  delayMicroseconds(10);
  digitalWrite(trig, LOW);
  //receive the trigger signal echo, and calculate cm to the object
  valueSensor= pulseIn(echo, HIGH);
  dist= valueSensor/58;

  // each 5 positions represents a different note
  byte i = dist / 5;

  // play note if in range
  if (i < NUMITEMS (pitchTable))
  {
    tone(spkr,pitchTable[i]);
  }
  else
  {
    tone(spkr,523.251160);
  }
  delay(125);
}


Code for Just Reading Sonar Value:

#define trig 7 //trigger pin on sonar module
#define echo 6 //echo pin
int dist; //how far the object is away from the module(cm)
int valueSensor = 0; //see here, just added this line

void setup()
{
  Serial.begin(9600);
  pinMode(echo, INPUT);
  pinMode(trig, OUTPUT);
}

void loop()
{
  //send a trigger signal
  digitalWrite(trig, HIGH);
  delayMicroseconds(10);
  digitalWrite(trig, LOW);
  //receive the trigger signal echo, and calculate cm to the object
  valueSensor= pulseIn(echo, HIGH);
  dist= valueSensor/58; //converts raw to cm, valueSensor/74/2 = inches
 
  Serial.println(dist);
}


Pics:


LM386 scheme:

Sunday, October 23, 2011

Robot Club "NTX+TETRIX" Robot

Here are some pics of the NTX+TETRIX robot that i have been building for "robot club". Pretty much no one else showed up for the work day so i built this all by my self. All that's left pretty much, is to mount the NXT, battery, and the crate(or magnetic ball?) claw.

2 Motor and 1 Servo controller, with quick connect adapters connected.
Back View.
Quick connect power cables.
Front view.
Side view

Saturday, October 22, 2011

PIR sensor and RGB LED indicators

Using the same RGB LEDs from the last project, i hooked up a PIR sensor sample from Parallax. It takes about 30sec to configure its self each time it powers on, and blinks red from the first RGB LED while its configuring. Then it lays in wait for movement, and then vigorously blinks the RGB LEDs until the movement has stopped. The PIR sensor outputs Either LOW(0v) or HIGH(5v) to the digital Arduino pin it is connected to depending on the status of the sensor. If motion is present, the PIR goes HIGH, and goes to LOW every once in a while even if motion is present. Then once no more motion is detected, the PIR outputs LOW.

/*
* //////////////////////////////////////////////////
* //making sense of the Parallax PIR sensor's output
* //////////////////////////////////////////////////
*
* Switches a LED according to the state of the sensors output pin.
* Determines the beginning and end of continuous motion sequences.
*
* @author: Kristian Gohlke / krigoo (_) gmail (_) com / http://krx.at
* @date: 3. September 2006
*
* kr1 (cleft) 2006
* released under a creative commons "Attribution-NonCommercial-ShareAlike 2.0" license
* http://creativecommons.org/licenses/by-nc-sa/2.0/de/
*
*
* The Parallax PIR Sensor is an easy to use digital infrared motion sensor module.
* (http://www.parallax.com/detail.asp?product_id=555-28027)
*
* The sensor's output pin goes to HIGH if motion is present.
* However, even if motion is present it goes to LOW from time to time,
* which might give the impression no motion is present.
* This program deals with this issue by ignoring LOW-phases shorter than a given time,
* assuming continuous motion is present during these phases.
*
*/

/////////////////////////////
//VARS
//the time we give the sensor to calibrate (10-60 secs according to the datasheet)
int calibrationTime = 30;

//the time when the sensor outputs a low impulse
long unsigned int lowIn;

//the amount of milliseconds the sensor has to be low
//before we assume all motion has stopped
long unsigned int pause = 5000;

boolean lockLow = true;
boolean takeLowTime;

int pirPin = 2; //the digital pin connected to the PIR sensor's output

int colorz;
int LEDx;
int delayx;
int pinx;
int pinz;
int piny;
int blnd;

/////////////////////////////
//SETUP
void setup()
{
Serial.begin(9600);
pinMode(pirPin, INPUT);

pinMode(13, OUTPUT);
pinMode(12, OUTPUT);
pinMode(11, OUTPUT);
//LED2
pinMode(3, OUTPUT);
pinMode(4, OUTPUT);
pinMode(8, OUTPUT);
//LED3
pinMode(7, OUTPUT);
pinMode(6, OUTPUT);
pinMode(5, OUTPUT);

//give the sensor some time to calibrate
Serial.print("calibrating sensor ");
for(int i = 0; i < calibrationTime; i++){
Serial.print(".");
digitalWrite(13,HIGH);
delay(500);
digitalWrite(13,LOW);
delay(500);
}
Serial.println(" done");
Serial.println("SENSOR ACTIVE");
delay(50);
}

////////////////////////////
//LOOP
void loop()
{

if(digitalRead(pirPin) == HIGH)
{
int ps = 50;
light(1,1,ps); //LED1-Red
light(2,2,ps); //LED2-green
light(3,3,ps); //LED3-blue

blend(1,1,ps); //LED1-purple RG
blend(2,2,ps); //LED2-light blue GB
blend(3,3,ps); //LED3-yellow RB
blend(1,4,ps); //LED1-White RGB //the led visualizes the sensors output pin state

if(lockLow)
{
//makes sure we wait for a transition to LOW before any further output is made:
lockLow = false;
Serial.println("---");
Serial.print("motion detected at ");
Serial.print(millis()/1000);
Serial.println(" sec");
delay(50);
}
takeLowTime = true;
}

if(digitalRead(pirPin) == LOW)
{
LEDLOW(); //the led visualizes the sensors output pin state

if(takeLowTime)
{
lowIn = millis(); //save the time of the transition from high to LOW
takeLowTime = false; //make sure this is only done at the start of a LOW phase
}
//if the sensor is low for more than the given pause,
//we assume that no more motion is going to happen
if(!lockLow && millis() - lowIn > pause)
{
//makes sure this block of code is only executed again after
//a new motion sequence has been detected
lockLow = true;
Serial.print("motion ended at "); //output
Serial.print((millis() - pause)/1000);
Serial.println(" sec");
delay(50);
}
}
}

void LEDLOW()
{
digitalWrite(13, LOW);
digitalWrite(12, LOW);
digitalWrite(11, LOW);
digitalWrite(3, LOW);
digitalWrite(4, LOW);
digitalWrite(8, LOW);
digitalWrite(7, LOW);
digitalWrite(6, LOW);
digitalWrite(5, LOW);
}

void light(int LEDx,int colorz,int delayx)
{
if(LEDx == 1) //if LEDx is 1(which is the first LED(digital pins 13-11))
{
if(colorz == 1) //if colorz is 1 then turn on pin 13 with delay in on/off,
{ // which is red of first RGB LED
blinkz(13, delayx);
}

if(colorz == 2) //if colorz is 2 then turn on pin 12 with delay in on/off,
{ //which is green of first RGB LED
blinkz(12, delayx);
}

if(colorz == 3) //if colorz is 3 then turn on pin 11 with delay in on/off,
{ //which is blue of first RGB LED
blinkz(11, delayx);
} //and so on for the rest of the if statements
}

if(LEDx == 2)
{
if(colorz == 1)
{
blinkz(3, delayx); //uses digital pin 3
}

if(colorz == 2)
{
blinkz(4, delayx); //uses digital pin 4
}

if(colorz == 3)
{
blinkz(8, delayx); //uses digital pin 8
}
}

if(LEDx == 3)
{
if(colorz == 1)
{
blinkz(7, delayx);
}

if(colorz == 2)
{
blinkz(6, delayx);
}

if(colorz == 3)
{
blinkz(5, delayx);
}
}
}

void blinkz(int pinx, int delayx) //blinks one LED at a time on/off with an established time delay(delayx)
{
digitalWrite(pinx, HIGH);
delay(delayx);
digitalWrite(pinx, LOW);
delay(delayx);
}

void blend(int LEDx, int colorz, int delayx)
{
if(LEDx == 1)
{
if(colorz == 1)
{
//red+green, purple
mixblend(13,12,delayx); //two pins at once to mix colors, or random two pins of any LED at a time.
}

if(colorz == 2)
{
//Green+blue, light blue
mixblend(12,11,delayx);
}

if(colorz == 3)
{
//red+blue,
mixblend(13,11,delayx);
}

if(colorz == 4)
{
whiteblend(13,12,11,delayx); //makes white(if you do three pins from same RGB LED, or random three pins of any LED at a time.
}
}

if(LEDx == 2)
{
if(colorz == 1)
{
mixblend(3,4,delayx);
}

if(colorz == 2)
{
mixblend(4,8,delayx);
}

if(colorz == 3)
{
mixblend(3,8,delayx);
}

if(colorz == 4)
{
whiteblend(3,4,8,delayx);
}
}

if(LEDx == 3)
{
if(colorz == 1)
{
mixblend(7,6,delayx);
}

if(colorz == 2)
{
mixblend(6,5,delayx);
}

if(colorz == 3)
{
mixblend(7,5,delayx);
}

if(colorz == 4)
{
whiteblend(7,6,5,delayx);
}
}
}

//pinx, pinz, are any two LED pins
//you want to light at one time
void mixblend(int pinx, int pinz, int delayx) //tells which two LEDs to blend
{
digitalWrite(pinx, HIGH);
digitalWrite(pinz, HIGH);
delay(delayx);
digitalWrite(pinx, LOW);
digitalWrite(pinz, LOW);
delay(delayx);
}

//pinx, pinz, piny are any three LED pins
//you want to light at one time, do three from same LED for white
void whiteblend(int pinx, int pinz, int piny, int delayx)
{
digitalWrite(pinx, HIGH);
digitalWrite(pinz, HIGH);
digitalWrite(piny, HIGH);
delay(delayx);
digitalWrite(pinx, LOW);
digitalWrite(pinz, LOW);
digitalWrite(piny, LOW);
delay(delayx);
}

*use the "Auto Format"(Cntrl + T) option under the tool menu in the Arduino IDE to fix the formatting. As you can see i didn't write this code, only added the RGB LED stuff to it...but it is fairly simple. Thr following is the original code.


/////////////////////////////
//VARS
//the time we give the sensor to calibrate (10-60 secs according to the datasheet)
int calibrationTime = 30;      

//the time when the sensor outputs a low impulse
long unsigned int lowIn;        

//the amount of milliseconds the sensor has to be low
//before we assume all motion has stopped
long unsigned int pause = 5000;

boolean lockLow = true;
boolean takeLowTime;

int pirPin = 7;    //the digital pin connected to the PIR sensor's output
int ledPin = 8;


/////////////////////////////
//SETUP
void setup(){
  Serial.begin(9600);
  pinMode(pirPin, INPUT);
  pinMode(ledPin, OUTPUT);
  digitalWrite(pirPin, LOW);

  //give the sensor some time to calibrate
  Serial.print("calibrating sensor ");
    for(int i = 0; i < calibrationTime; i++){
      Serial.print(".");
      delay(1000);
      }
    Serial.println(" done");
    Serial.println("SENSOR ACTIVE");
    delay(50);
  }

////////////////////////////
//LOOP
void loop(){

     if(digitalRead(pirPin) == HIGH){
       digitalWrite(ledPin, HIGH);   //the led visualizes the sensors output pin state
       if(lockLow){
         //makes sure we wait for a transition to LOW before any further output is made:
         lockLow = false;          
         Serial.println("---");
         Serial.print("motion detected at ");
         Serial.print(millis()/1000);
         Serial.println(" sec");
         delay(50);
         }        
         takeLowTime = true;
       }

     if(digitalRead(pirPin) == LOW){      
       digitalWrite(ledPin, LOW);  //the led visualizes the sensors output pin state

       if(takeLowTime){
        lowIn = millis();          //save the time of the transition from high to LOW
        takeLowTime = false;       //make sure this is only done at the start of a LOW phase
        }
       //if the sensor is low for more than the given pause,
       //we assume that no more motion is going to happen
       if(!lockLow && millis() - lowIn > pause){
           //makes sure this block of code is only executed again after
           //a new motion sequence has been detected
           lockLow = true;                      
           Serial.print("motion ended at ");      //output
           Serial.print((millis() - pause)/1000);
           Serial.println(" sec");
           delay(50);
           }
       }
  }

 Pics:
 The Arduino is waiting for the PIR sensor to configure, and blinking red while it waits.
Done configuring PIR sensor, and waiting for something to move!
I moved the camera too much, and so the PIR sensor has sensed motion is blinking all the LEDs!

Moppy - Playing Music with Floppy Drives!

I played MIDI music files through a JAVA app to my Arduino, which had 4 floppy drives connected. The code isnt mine; it was written by SammyIAm. Code for JAVA and Arduino here: Github SammyIAm Moppy Instructions at Github for how to install the Netbeans JAVA IDE and a general overview of the project.

Quick connect guide for the floppy, Arduino, and PSU.


.
.


.

Rather than waste PSU floppy conenctors, i just took some solid core wire and parallel connected 5v and GND from each floppy drive, then used a jumper(see pic) for drive select, and connected the step(pin 20) and direction(pin 18) to the Arduino. Furthermore, contrary to "popular" belief, only five connections are required on each floppy drive. 12v(Yellow) is not required, and pin 1 of the floppy cable doesn't need to be grounded.

The following are the only required connections for each floppy drive:
Pin 14->GND this can be done by simply putting one of those IDE HDD 2 pin jumpers between pin 14 and a nearby GND pin on the floppy drives data port.
Pin 18->Arduino digital pin
Pin 20-> Arduino digital pin
5v(Red) to External 5v PSU
GND(either black wire) to Arduino AND external PSU GND

8 floppy setup:


Video of my results:


Controlling 3 RGB LEDs from arduino

basically i hooked up each pin(except for GND) of a common cathode RGB LED to the arduino with resistors, and then wrote a quick program to control all three color of each LEDs easily.

//light
//light(1,1,ps); light(LEDx,colorz,Time);
//
//LED: 1 or 2 or 3
//
//colorz: 1 -Red
//colorz: 2 -Green
//colorz: 3 -Blue
//
//time in ms


//blend
//blend(1,1,ps); blend(LEDx,colorz,Time);
//
//LED: 1 or 2 or 3
//
//colorz: 1 -RG yellow
//colorz: 2 -GB light blue
//colorz: 3 -RB purple/pink
//colorz: 4 -RGB white
//
//time in ms
int colorz;
int LEDx;
int delayx;
int pinx;
int pinz;
int piny;
int blnd;

void setup()
{
//LED1
pinMode(13, OUTPUT);
pinMode(12, OUTPUT);
pinMode(11, OUTPUT);
//LED2
pinMode(3, OUTPUT);
pinMode(4, OUTPUT);
pinMode(8, OUTPUT);
//LED3
pinMode(7, OUTPUT);
pinMode(6, OUTPUT);
pinMode(5, OUTPUT);
}

void loop()
{
int ps = 75;
light(1,1,ps); //LED1-Red
light(2,2,ps); //LED2-green
light(3,3,ps); //LED3-blue

blend(1,1,ps); //LED1-purple RG
blend(2,2,ps); //LED2-light blue GB
blend(3,3,ps); //LED3-yellow RB
blend(1,4,ps); //LED1-White RGB
}

void light(int LEDx,int colorz,int delayx)
{
if(LEDx == 1) //if LEDx is 1(which is the first LED(digital pins 13-11))
{
if(colorz == 1) //if colorz is 1 then turn on pin 13 with delay in on/off,
{ // which is red of first RGB LED
blinkz(13, delayx);
}

if(colorz == 2) //if colorz is 2 then turn on pin 12 with delay in on/off,
{ //which is green of first RGB LED
blinkz(12, delayx);
}

if(colorz == 3) //if colorz is 3 then turn on pin 11 with delay in on/off,
{ //which is blue of first RGB LED
blinkz(11, delayx);
} //and so on for the rest of the if statements
}

if(LEDx == 2)
{
if(colorz == 1)
{
blinkz(3, delayx); //uses digital pin 3
}

if(colorz == 2)
{
blinkz(4, delayx); //uses digital pin 4
}

if(colorz == 3)
{
blinkz(8, delayx); //uses digital pin 8
}
}

if(LEDx == 3)
{
if(colorz == 1)
{
blinkz(7, delayx);
}

if(colorz == 2)
{
blinkz(6, delayx);
}

if(colorz == 3)
{
blinkz(5, delayx);
}
}
}

void blinkz(int pinx, int delayx) //blinks one LED at a time on/off with an established time delay(delayx)
{
digitalWrite(pinx, HIGH);
delay(delayx);
digitalWrite(pinx, LOW);
delay(delayx);
}

void blend(int LEDx, int colorz, int delayx)
{
if(LEDx == 1)
{
if(colorz == 1)
{
//red+green, purple
mixblend(13,12,delayx); //two pins at once to mix colors, or random two pins of any LED at a time.
}

if(colorz == 2)
{
//Green+blue, light blue
mixblend(12,11,delayx);
}

if(colorz == 3)
{
//red+blue,
mixblend(13,11,delayx);
}

if(colorz == 4)
{
whiteblend(13,12,11,delayx); //makes white(if you do three pins from same RGB LED, or random three pins of any LED at a time.
}
}

if(LEDx == 2)
{
if(colorz == 1)
{
mixblend(3,4,delayx);
}

if(colorz == 2)
{
mixblend(4,8,delayx);
}

if(colorz == 3)
{
mixblend(3,8,delayx);
}

if(colorz == 4)
{
whiteblend(3,4,8,delayx);
}
}

if(LEDx == 3)
{
if(colorz == 1)
{
mixblend(7,6,delayx);
}

if(colorz == 2)
{
mixblend(6,5,delayx);
}

if(colorz == 3)
{
mixblend(7,5,delayx);
}

if(colorz == 4)
{
whiteblend(7,6,5,delayx);
}
}
}

//pinx, pinz, are any two LED pins
//you want to light at one time
void mixblend(int pinx, int pinz, int delayx) //tells which two LEDs to blend
{
digitalWrite(pinx, HIGH);
digitalWrite(pinz, HIGH);
delay(delayx);
digitalWrite(pinx, LOW);
digitalWrite(pinz, LOW);
delay(delayx);
}

//pinx, pinz, piny are any three LED pins
//you want to light at one time, do three from same LED for white
void whiteblend(int pinx, int pinz, int piny, int delayx)
{
digitalWrite(pinx, HIGH);
digitalWrite(pinz, HIGH);
digitalWrite(piny, HIGH);
delay(delayx);
digitalWrite(pinx, LOW);
digitalWrite(pinz, LOW);
digitalWrite(piny, LOW);
delay(delayx);
}
*use the "Auto Format"(Cntrl + T) option under the tool menu in the Arduino IDE to fix the formatting. Pics:

Tuesday, October 18, 2011

Computer and/or Arduino controlled Etch-a-Sketch

Last weekends project was to make a Etch-a-sketch controlled by a Arduino and eventually a computer. It was pretty simple, only taking a few hours start to finish. i made both a computer controlled version(which will eventually take images and sketch them), and a simple Arduino version. the only difference really is that the computer version of the Arduino code has a serial interface for receiving commands.

Computer Version:
The computer interface is a simple C# forms program with buttons for up, down, left, right, and diagonals. I think eventually I will add shapes with custom dimensions features to the program.
using System;
using System.IO;
using System.Windows.Forms;
using System.IO.Ports;

namespace EASproject
{
public class EAS_ControlForm : System.Windows.Forms.Form
{
private Button Up4;
private Button Down3;
private Button Left2;
private Button Right1;
private Button Stop9;
private Button DLD5;
private Button DRD6;
private Button ULD7;
private Button URD8;

public EAS_ControlForm()
{
Text = "EAS Control";
Down3 = new Button ();
Up4 = new Button ();
Left2 = new Button ();
Right1 = new Button ();
Stop9 = new Button ();
DLD5 = new Button ();
DRD6 = new Button ();
ULD7 = new Button ();
URD8 = new Button ();
this.BackColor = System.Drawing.Color.LightBlue;

Down3.Text = "Down";
Down3.Name = "Down3";
Down3.Size = new System.Drawing.Size (72, 30);
Down3.Location = new System.Drawing.Point (105, 65);
Controls.AddRange(new System.Windows.Forms.Control[] {this.Down3});
Down3.Click += new System.EventHandler(OnClickDown3);

Up4.Text = "Up";
Up4.Name = "Up4";
Up4.Size = new System.Drawing.Size (72, 30);
Up4.Location = new System.Drawing.Point (105, 30);
Controls.AddRange(new System.Windows.Forms.Control[] {this.Up4});
Up4.Click += new System.EventHandler(OnClickUp4);

Left2.Text = "Left";
Left2.Name = "Left2";
Left2.Size = new System.Drawing.Size (72, 30);
Left2.Location = new System.Drawing.Point (27, 45);
Controls.AddRange(new System.Windows.Forms.Control[] {this.Left2});
Left2.Click += new System.EventHandler(OnClickLeft2);

Right1.Text = "Right";
Right1.Name = "Right1";
Right1.Size = new System.Drawing.Size (72, 30);
Right1.Location = new System.Drawing.Point (182, 45);
Controls.AddRange(new System.Windows.Forms.Control[] {this.Right1});
Right1.Click += new System.EventHandler(OnClickRight1);

DLD5.Text = "Down.Left diagonal";
DLD5.Name = "DLD5";
DLD5.Size = new System.Drawing.Size (72, 30);
DLD5.Location = new System.Drawing.Point (27, 170);
Controls.AddRange(new System.Windows.Forms.Control[] {this.DLD5});
DLD5.Click += new System.EventHandler(OnClickDLD5);

DRD6.Text = "Down.Right diagonal";
DRD6.Name = "DRD6";
DRD6.Size = new System.Drawing.Size (72, 30);
DRD6.Location = new System.Drawing.Point (182, 170);
Controls.AddRange(new System.Windows.Forms.Control[] {this.DRD6});
DRD6.Click += new System.EventHandler(OnClickDRD6);

ULD7.Text = "Up.Left diagonal";
ULD7.Name = "ULD7";
ULD7.Size = new System.Drawing.Size (72, 30);
ULD7.Location = new System.Drawing.Point (27, 135);
Controls.AddRange(new System.Windows.Forms.Control[] {this.ULD7});
ULD7.Click += new System.EventHandler(OnClickULD7);

URD8.Text = "Up.Right diagonal";
URD8.Name = "URD8";
URD8.Size = new System.Drawing.Size (72, 30);
URD8.Location = new System.Drawing.Point (182, 135);
Controls.AddRange(new System.Windows.Forms.Control[] {this.URD8});
URD8.Click += new System.EventHandler(OnClickURD8);

Stop9.Text = "Stop Motors!";
Stop9.Name = "Stop9";
Stop9.Size = new System.Drawing.Size (72, 30);
Stop9.Location = new System.Drawing.Point (105, 95);
Controls.AddRange(new System.Windows.Forms.Control[] {this.Stop9});
Stop9.Click += new System.EventHandler(OnClickStop9);
}

static SerialPort port;
static public void Main()
{
port = new SerialPort("COM1", 9600, Parity.None, 8, StopBits.One);
port.Open();

Application.Run(new EAS_ControlForm());
}

public static void Example()
{
AppDomain currentDomain = AppDomain.CurrentDomain;
currentDomain.UnhandledException += new UnhandledExceptionEventHandler(MyHandler);

try {
throw new Exception("1");
} catch (Exception e)
{
MessageBox.Show("Catch clause caught : " + e.Message);
}

throw new Exception("2");
}

static void MyHandler(object sender, UnhandledExceptionEventArgs args)
{
Exception e = (Exception) args.ExceptionObject;
Console.WriteLine("MyHandler caught : " + e.Message);
}

static void OnClickDown3 (object sender, System.EventArgs e)
{
port.Write("<9,100>");
port.Write("<3,100>");
}

static void OnClickUp4 (object sender, System.EventArgs e)
{
port.Write("<9,100>");
port.Write("<4,100>");
}

static void OnClickLeft2 (object sender, System.EventArgs e)
{
port.Write("<9,100>");
port.Write("<2,100>");
}

static void OnClickRight1 (object sender, System.EventArgs e)
{
port.Write("<9,100>");
port.Write("<1,100>");
}

static void OnClickDLD5 (object sender, System.EventArgs e)
{
port.Write("<9,100>");
port.Write("<5,100>");
}

static void OnClickDRD6 (object sender, System.EventArgs e)
{
port.Write("<9,100>");
port.Write("<6,100>");
}

static void OnClickULD7 (object sender, System.EventArgs e)
{
port.Write("<9,100>");
port.Write("<7,100>");
}

static void OnClickURD8 (object sender, System.EventArgs e)
{
port.Write("<9,100>");
port.Write("<8,100>");
}

static void OnClickStop9 (object sender, System.EventArgs e)
{
port.Write("<9,100>");
}
}
}
As you can see, i really need to work on the repetition in the code...

Arduino Code:
#include

Servo Xaxis;
Servo Yaxis;

int started = 0;
char inData[8];
int ended = 0;
char index = 0;
int final = 0;

void setup()
{
Xaxis.write(90);
Xaxis.attach(6);

Yaxis.write(90);
Yaxis.attach(5);

Serial.begin(9600);
}

void loop()
{
while(Serial.available() > 0)
{
char aChar = Serial.read();
if(aChar == '<') { started = true; index = 0; inData[index] = '\0'; } else if(aChar == '>')
{
ended = true;
}

else if(started)
{
inData[index] = aChar;
index++;
inData[index] = '\0';
}

else if (aChar =='*')
{
final = true;
}
}

if(started && ended)
{
const char* strDelimiter = ",";

char* p;
int time;
int dir;

if ( p = strtok(inData, strDelimiter) )
{
dir = atoi(p);
}
if ( p = strtok(NULL, strDelimiter) )
{
time = atoi(p);
}

// Get ready for the next time
started = false;
ended = false;
index = 0;
inData[index] = '\0';

Move(dir, time);
}
}

//Servos move the dot on etch-a-sketch screen 1in/sec or 31/32
void Move(int dir, int time)
{
if(dir == 1)
{
//Xaxis Right
Xaxis.write(180);
//
}

if(dir == 2)
{
//Xaxis Left
Xaxis.write(0);
}

if(dir == 3)
{
//Yaxis Down
Yaxis.write(0);
}

if(dir == 4)
{
//Yaxis Up
Yaxis.write(180);
}

if(dir == 5)
{
//Down+Left diagonal
Yaxis.write(0);
Xaxis.write(0);
}

if (dir == 6)
{
//Down+Right diagonal
Yaxis.write(0);
Xaxis.write(180);
}

if (dir == 7)
{
//Up+Left diagonal
Yaxis.write(180);
Xaxis.write(0);
}

if (dir == 8)
{
//Up+Right diagonal
Yaxis.write(180);
Xaxis.write(180);
}

if(dir == 9)
{
//stop both motors
Yaxis.write(90);
Xaxis.write(90);
}
}
Basically how this works is: when a button is pressed in the C# program, it stops all previous motor activity by sending "<9,100>" over the serial port to the Arduino. then "<7,100>" is sent which is, in this case, the command for making a 45degree up and left diagonal line on the etch a sketch.
When the Arduino receives the "<7,100>" data, it first checks to make sure it has all of the data by checking for a "<" and a ">" at the beginning and end, respectively, of the line received. then it write the actual data, which is 7,100, to a index. Next, the strtok function reads the index and separates the data by the comma. "7" is written to int dir and "100" to int time. the number in int time isn't important in this version of the code, its only a space holder so i didn't have to rewrite some of the code. Then the line "Move(dir, time)" reads int dir, and turns on the correct motor full speed according to the number in int dir.

int time could be more accurately portrayed as "speed" but that's what i chose at the time of writing the code. In the lines "Yaxis.write(180); Xaxis.write(0);" the values 0 and 180 are full speed in opposite directions. Yaxis is the motor for moving the Etch-A-sketch "utensil" up and down, Xaxis -- left and right. 90 is for stopping the continuous servos(or some call the just motors).

Arduino only version:
#include

Servo Yaxis; // create servo object to control a servo
Servo Xaxis; // a maximum of eight servo objects can be created

int pos = 0;

void setup()
{
Serial.begin(9600);

Xaxis.write(90); //stop both servos
Yaxis.write(90);

Yaxis.attach(5); // attaches the servo on pin 9 to the servo object
Xaxis.attach(6);


Move(1,1950); //Xaxis right
}

void loop()
{
}

void Move(int dir, int time)
{
if (dir == 1)
{
Serial.print("Xaxis Right for ");
Serial.print(time);
Serial.print("ms");
Serial.println();
Xaxis.write(180);
delay(time);
Xaxis.write(90);
}

if (dir == 2)
{
Serial.print("Xaxis Left for ");
Serial.print(time);
Serial.print("ms");
Serial.println();
Xaxis.write(0);
delay(time);
Xaxis.write(90);
}

if (dir == 3)
{
Serial.print("Yaxis Down for ");
Serial.print(time);
Serial.print("ms");
Serial.println();
Yaxis.write(0);
delay(time);
Yaxis.write(90);
}

if (dir == 4)
{
Serial.print("Yaxis Up for ");
Serial.print(time);
Serial.print("ms");
Serial.println();
Yaxis.write(180);
delay(time);
Yaxis.write(90);
}

if (dir == 5)
{
Serial.print("Down+Left diagonal for ");
Serial.print(time);
Serial.print("ms");
Serial.println();

Yaxis.write(0); // tell servo to go to position in variable 'pos'
Xaxis.write(0);
delay(time); // waits 15ms for the servo to reach the position

Xaxis.write(90);
Yaxis.write(90);
}

if (dir == 6)
{
Serial.print("Down+Right diagonal for ");
Serial.print(time);
Serial.print("ms");
Serial.println();
Yaxis.write(0);
Xaxis.write(180);
delay(time);
Yaxis.write(90);
}

if (dir == 7)
{
Serial.print("Up+Left diagonal for ");
Serial.print(time);
Serial.print("ms");
Serial.println();
Yaxis.write(180);
Xaxis.write(0);
delay(time);
Yaxis.write(90);
}

if (dir == 8)
{
Serial.print("Up+Right diagonal for ");
Serial.print(time);
Serial.print("ms");
Serial.println();
Yaxis.write(180);
Xaxis.write(180);
delay(time);
Yaxis.write(90);
}
}
This version doesn't require a computer for moving the servos, instead the motors are told what to do in the actual code. (But i do have Serial.Print to debug the code, and make sure the code is working correctly.) This can be seen in "void setup()" with the "Move(1,1950);" line. Now, the Arduino does not only control which motor turns, but also how long. In the line above, "1,1950" is moving the Etch-a-Sketch "cursor" right along the X-Axis for 1950ms which is 1.95seconds once per time the Arduino code is ran.

Pics: I used the same breadboard Arduino for the RGB LEDs and the Etch-A-Sketch.